Table of Contents
- Why a Bath Tub to Walk-In Shower Conversion Makes Sense Now
- Walk-In Shower vs. Bathtub: Which Fits Your Life?
- Accessible Shower Design: What to Plan Before You Buy
- Grab Bars for Walk-In Showers: Placement and Installation
- Walk-In Shower Installation Timeline: What to Expect Week by Week
- The Installation Process: Demolition, Waterproofing, and Code Requirements
- What a Bath Tub to Walk-In Shower Conversion Really Costs
- Conclusion
- Frequently Asked Questions
Last Updated: October 19, 2026
Why a Bath Tub to Walk-In Shower Conversion Makes Sense Now
Your bathroom may look safe. That is not the same thing as being safe.
I started Bentley Baths after my mother fell in a traditional bathtub.
Here is the question I ask every homeowner.
If standing up has become a hostage negotiation with your knees, that is useful information.
The CDC guidance on preventing falls at home is blunt about this. Falls are not a small inconvenience.
A shower conversion is not a luxury purchase.
Walk-In Shower vs. Bathtub: Which Fits Your Life?
A walk-in shower wins for most people who plan to stay in their home because it removes the step-over and slip risk. A bathtub still wins if you soak, if you have young grandchildren, or if resale matters more than daily safety.
I am not neutral here. I favor solutions that keep people bathing independently, and a walk-in shower does that better than a tub for most aging bodies. But here is the fair comparison.
Keep the bathtub if:
- You soak regularly and enjoy it
- You have small children or grandchildren who bathe there
- Your bathroom has only one tub and you worry about resale
Convert to a walk-in shower if:
- Stepping over the tub wall makes you nervous
- You have arthritis, neuropathy, or balance issues
- You use a cane, walker, or wheelchair
The most common mistake I see is keeping a tub “for resale” while the person who lives there stops bathing safely. A bathroom that scares you is not an asset. It is a daily risk.
Accessible Shower Design: What to Plan Before You Buy
Accessible shower design means planning the entry, floor, seat, and reach zones before anyone swings a hammer. Get those four right and the shower works for decades. Get them wrong and you will pay twice.
Low-Threshold Entry and Curbless Options
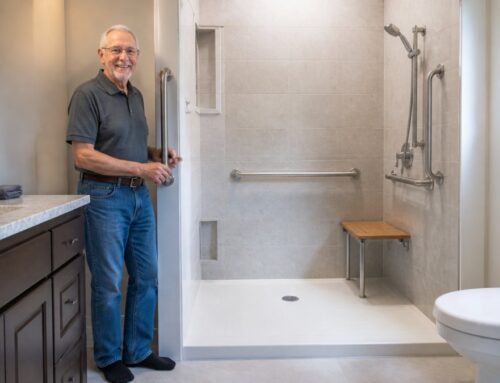
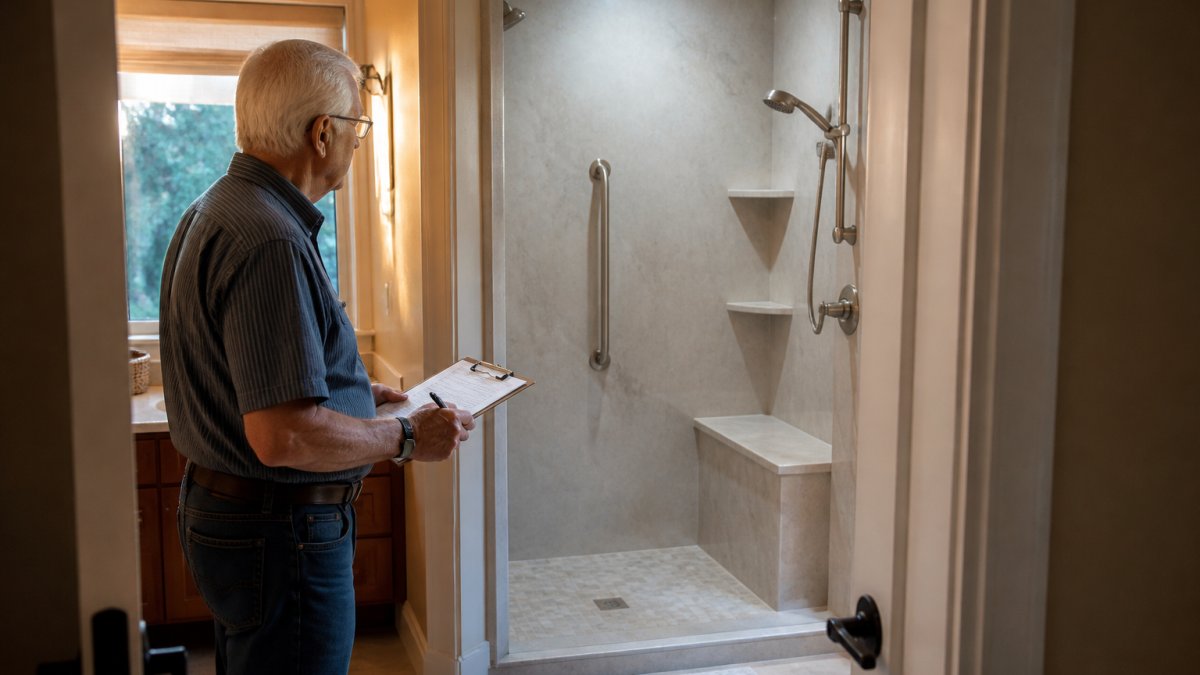
A low-threshold entry has a small lip to keep water in. A curbless shower has no lip, so a wheelchair or walker rolls straight in. Curbless is the gold standard for accessibility, and it costs more because the floor has to be built to drain correctly. It is worth it when mobility matters.
Seating, Lighting, and Easy-to-Clean Surfaces
A built-in shower seat changes everything. You can sit, rest, and wash without balancing. Add a handheld shower head, bright lighting, and smooth walls you can wipe down in a minute. Easy-to-clean surfaces are about dignity, not tidiness. If cleaning becomes a chore you cannot manage, the shower stops getting used.
Put the shower controls and the handheld head where you can reach them while seated. Most installers mount them at standing height out of habit. Ask for seated reach, and test it before the tile goes up.
Grab Bars for Walk-In Showers: Placement and Installation
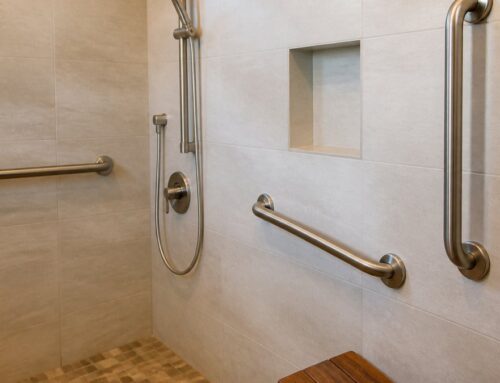
Grab bars for walk-in showers must be anchored into solid blocking behind the wall, not just screwed into tile. Placement matters more than the bar itself. Here is where I put them, based on watching people actually move in a shower:
- Vertical bar at the entry: for steadying yourself as you step in
- Horizontal bar beside the seat: for pushing up to stand
- Vertical bar near the controls: for balance while reaching
A towel bar is not a grab bar. It will fail, and it is never a small fall. Installation requires blocking in the wall framing before the walls close up. If you are already remodeling, add the blocking now.
The ADA Standards for Accessible Design offer useful reference points for bar placement and mounting heights, even in a private home.
Walk-In Shower Installation Timeline: What to Expect Week by Week
A walk-in shower installation timeline runs about one to two weeks for a straightforward conversion, longer if plumbing moves or the layout changes. Here is the honest version, not the sales version.
| Phase | What Happens | Typical Duration |
|---|---|---|
| Consultation and design | Measure, plan, choose materials | 1 to 2 visits |
| Ordering and permits | Materials arrive, permits pulled | 1 to 3 weeks |
| Demolition | Old tub and surround removed | 1 day |
| Rough-in and plumbing | Drain and valve work, blocking added | 1 to 2 days |
| Waterproofing | Membrane and pan, then inspection | 1 to 2 days |
| Tile and finishes | Walls, floor, fixtures, grab bars | 3 to 5 days |
| Final inspection and cleanup | Sign-off and walkthrough | 1 day |
The installation itself is often one to two days for a simple swap. The full timeline is longer because of ordering and permits. Plan for disruption. If it is your only shower, arrange an alternative before demolition day, not the morning of.
The Installation Process: Demolition, Waterproofing, and Code Requirements
Waterproofing decides whether your shower lasts twenty years or leaks in three. Demolition is loud. Waterproofing is quiet. Waterproofing is the one that matters. The process moves in a fixed order, and skipping a step means paying for it later, usually through the ceiling below.
- Demolition. Remove the old tub, surround, and any rotten framing. This is the day the crew finds out what the last remodel hid. Plan for a surprise or two.
- Plumbing changes. Move the drain and valve if the layout requires it. Reusing the existing drain location saves money and time.
- Blocking. Add solid wood behind the walls for grab bars and the seat. This is the cheapest safety upgrade in the entire project, and it is only cheap right now.
- Waterproofing. Apply a waterproof membrane over the substrate and build a sloped shower pan so water runs to the drain. This is the step that separates a shower that lasts from a shower that leaks.
- Tile and fixtures. Set walls and floor, install the seat, bars, and showerhead. Test the controls from a seated position before the tile goes up.
- Inspection. Confirm the work meets local code. The inspection protects you, not the contractor.
Let me go deeper on the two steps most sales presentations gloss over: waterproofing and code.
Waterproofing: The Step That Decides Everything
Waterproofing is not one product. It is a system, and the pieces have to work together.
- The substrate. Cement board or a foam backer board, installed per the manufacturer’s instructions. Drywall in a shower is a countdown clock, not a wall.
- The membrane. A liquid-applied or sheet membrane that covers the walls and floor and ties into the drain assembly. The membrane has to be continuous. A pinhole is a leak.
- The pan and slope. The floor must slope toward the drain, typically about a quarter inch per foot, so water does not stand.
A common pattern is a crew that waterproofs the floor but not the walls, or the walls but not the curb. Water does not respect the parts you remembered. It finds the part you forgot.
Drainage, Slope, and Ventilation
Drainage is not just the drain. It is the slope, the drain location, and the venting that lets water leave the system.
- Drain location. Center drains are common. Linear drains let you slope in one direction and are popular with curbless designs. Either works if the slope is right.
- Drain size. Residential shower drains are typically two inches. Do not let anyone downsize to save a trip to the supply house.
- Venting. The drain trap needs a vent, and the vent has to be done to local code. A gurgling drain is often a venting problem, not a clog.
Code Requirements and Permits
Code requirements vary by state and city. Permits, drain sizing, venting, and inspection schedules are set locally. That is why I tell people to ask their licensed contractor three questions in writing:
- Which permits does this project need?
- Who pulls them, and who pays for them?
- When is the inspection, and what happens if it fails?
A common mistake is skipping the inspection to save a week. Do not. The inspection is the one independent set of eyes on the work before the walls close. It is cheap insurance.
Ask your contractor to photograph the blocking and the waterproofing before tile goes up. Those photos are your record if anything goes wrong later. A good contractor will offer them before you ask.
A curbless shower is not a simple swap. It requires the floor to be recessed or built up so water still drains, and that is real carpentry and real waterproofing. If a bid for a curbless shower looks too good to be true, ask to see how the slope and drain are handled. The answer will tell you a lot.
What a Bath Tub to Walk-In Shower Conversion Really Costs
Conversion cost depends on the shower base, walls, plumbing changes, and whether the layout moves. Nobody honest gives you a firm number over the phone, and I will not either.
| Line Item | What It Covers | What Drives It Up | What Keeps It Down |
|---|---|---|---|
| Demolition and haul-away | Removing the tub, surround, and any rotten framing; disposal | Hidden water damage, tile set in mortar bed | Prefab surround, easy access |
| Plumbing rough-in | Moving the drain and valve, new supply lines if needed | Relocating the drain, changing valve location | Reusing the existing drain location |
| Blocking and framing | Solid wood behind walls for grab bars and seat | Adding a bench, multiple bars | Planning bars and seat before walls close |
| Waterproofing | Membrane, sloped pan, drain assembly, flood test | Curbless design, custom pan | Standard prefab pan with factory waterproofing |
| Shower base | The floor of the shower | Curbless, custom tile, linear drain | Standard acrylic or fiberglass base |
| Walls and finishes | Tile, surround, trim, grout, sealant | Large-format tile, niches, accent bands | Prefab wall panels |
| Fixtures | Valve, trim, showerhead, handheld | Thermostatic valve, multiple heads | Single-function valve, one head |
| Safety features | Grab bars, seat, lighting, non-slip floor | Custom seat, multiple bars, added lighting | Standard bars, factory non-slip base |
| Labor | Installation hours | Complex tile, layout changes | Simple swap, standard base |
| Permits and inspection | Local permit fees, inspection scheduling | Structural or plumbing changes | Straight swap with no plumbing move |
| Cleanup and walkthrough | Final cleaning, punch list, demonstration | Nothing, if the crew is disciplined | A crew that cleans as it goes |
I will not quote you a price because a real number requires seeing your bathroom. What I can tell you is what moves the cost the most, in order.
- Whether the drain moves. Reusing the existing drain location is the single biggest cost saver. Moving it means cutting floor, rerouting pipe, and rebuilding the pan.
- Curbless versus low-threshold. A curbless shower requires the floor to be recessed or built up so water still drains. That is real carpentry and real waterproofing, and it costs more. It is worth it when a wheelchair or walker is in the picture.
- Tile versus prefab. Tile is beautiful and repairable. Prefab is faster and often easier to clean. Neither is wrong. They just trade cost against look and maintenance.
- How many safety features you plan for now. Adding blocking for grab bars during the remodel costs very little. Adding it later means opening the wall again.
- Permits and inspection. These are set locally and are not negotiable. Ask who pulls them and who pays for them, and get that in writing.
Where people get hurt is not the price. It is the vague estimate.
A single lump-sum number with no line items is not an estimate. It is a wish. Ask for the scope in writing, line by line, and ask what is excluded. The exclusions are where the surprise lives.
Get an itemized, written scope before you sign. It should list demolition, plumbing, blocking, waterproofing, base, walls, fixtures, safety features, labor, permits, and cleanup. If a line is missing, ask why. If the answer is vague, that is your answer.
For current pricing on a conversion in your home, request a free evaluation from Bentley Baths. We look at your actual bathroom, walk the line items with you, and give you a real scope. You will talk with me or one of our age-in-place specialists, and family members are welcome to join.
Conclusion
Here is the challenge. What is actually getting harder in your bathroom right now?
A bath tub to walk-in shower conversion is one of the most practical changes you can make to stay independent at home.
At Bentley Baths, we start with diagnosis before purchase.
Call 800-688-0055 or visit BentleyBaths.com to schedule your evaluation. Bring your questions. The goal is to figure out what actually makes sense for your home.
Frequently Asked Questions
How long does a bath tub to walk-in shower conversion take?
Most conversions take several days to a couple of weeks, depending on the scope. A simple swap with a pre-made shower base can move quickly, while a curbless design requiring floor and drainage changes adds time. The walk-in shower installation timeline includes demolition, plumbing adjustments, waterproofing, tile or wall panels, and inspection. Ask your contractor for a written schedule before work begins, and build in a buffer for surprises hidden behind old walls.
Will Medicare pay for a walk-in shower for seniors?
Original Medicare generally does not cover bathroom modifications like a walk-in shower conversion, because it treats them as home improvements rather than medical care. Some Medicare Advantage plans may offer limited benefits, and certain state or local programs assist with accessibility updates. Check with your plan and your local Area Agency on Aging. Get any coverage commitment in writing before you sign a contract.
Which is better, a bathtub or a shower, for aging in place?
It depends on how you bathe and what your body needs. A walk-in shower with a low-threshold entry and a seat is easier to step into and out of than a traditional tub. A walk-in tub suits people who want to soak and need seated bathing. When weighing walk-in shower vs. bathtub, look at your balance, your knees, and whether you need help getting up. The right answer is the one that matches your daily routine.
What features make a walk-in shower easier to use safely?
Start with a low-threshold or curbless entry, then add a built-in seat, properly anchored grab bars, a handheld showerhead, and non-slip flooring. Good lighting and easy-to-clean wall surfaces help too. Accessible shower design should match your specific mobility needs, not a generic checklist. A free in-home safety assessment can identify what your bathroom actually requires before you commit to a design.