 Skip to content

Last Updated: November 8, 2026
Quick Summary
Installing grab bars for seniors means anchoring fixed rails into wall framing, not drywall or suction cups, so the bar supports real body weight. Measure the user’s elbow height while standing and mount the horizontal bar a few inches below it. Both flanges must land on solid wood, or you need rated blocking or anchors.
- Watch the person use the bathroom before marking any height, since the working hand and protective hand are often different.
- Studs usually sit 16 inches apart, though older homes can run 24 inches.
- Without studs, adding wood blocking between studs is the strongest option and the messiest one.
- Pull down hard with your full weight before anyone else uses the bar, and recheck each screw every season.
- Fiberglass drills cleanly, but tile needs a slow masonry bit and caulk around the flange afterward.
Table of Contents
- Before You Drill: What Installing Grab Bars for Seniors Really Requires
- Step 1: Shower Grab Bar Placement and Height for Real Bodies
- Step 2: Locate Wall Studs and Mark Your Mounting Holes
- Step 3: Drill Pilot Holes and Fasten the Bar to Studs or Blocking
- Step 4: Grab Bar Installation Without Studs: What Actually Holds
- Step 5: Angled vs Straight Grab Bars and Which Fits Your Bathroom
- Step 6: Tile, Fiberglass, and Other Wall Surfaces
- Step 7: Test the Load, Then Check It Every Season
- Frequently Asked Questions
Before You Drill: What Installing Grab Bars for Seniors Really Requires
A grab bar that pulls out of the wall is worse than no bar at all.
I’m George Bentley. For the bigger picture, see our guide on how to plan a safer bathroom for aging parents.
Grab bars for seniors are fixed rails anchored into wall framing, not towel bars or suction cups, designed to support a person’s weight during sitting, standing, and stepping.
Below, I’ll walk you through the seven steps I’d use in my own mother’s bathroom, including what to do when there’s no stud where you need one.
Tools and Materials to Gather First
Have everything within arm’s reach before you start. Half of all bad installations happen because someone left the room for a tool mid-job.
- Stud finder with deep-scan mode
- Cordless drill and bits for tile and wood
- Masonry bits if you hit block or brick
- Tape measure, pencil, and a 2-foot level
- Grab bar rated for body weight, with flanges
- Stainless screws long enough to bite 1.5 inches into solid wood
- Silicone caulk for wet areas
- Safety glasses and a helper
One more thing: read the bar’s label. A bar sold as decorative may not carry a load rating. If the packaging doesn’t state one, put it back.
Step 1: Shower Grab Bar Placement and Height for Real Bodies
Shower grab bar placement should follow the person, not a chart.
Here’s the part most guides skip: before you touch a stud finder, watch the person use the bathroom.
How do they transfer? Sitting and standing from a tub edge, shower seat, or toilet are three different motions. Someone who backs up to a seat needs a vertical bar behind or beside them to pull against. Someone who steps in sideways needs a horizontal bar at the entry to hold while they swing a leg. Ask them to show you, slowly, how they get in and out now.
What’s their reach? Have them stand where they’d stand and reach for an imaginary bar. Mark that spot.
Now the numbers.
The ADA Standards for Accessible Design set specific heights and clearances for public facilities.
Watch out: mounting a bar too high forces an overhead reach, exactly the motion that throws an unsteady person off balance.
Horizontal, Vertical, and Where the Toilet Bar Goes
Horizontal bars work for pulling up and steadying. Vertical bars suit a hand that needs to grip while rising. The direction matters less than whether the hand can find the bar without looking.
- Tub or shower entry: one horizontal bar inside the enclosure, one just outside, so there’s always something to hold during the step over the rim
- Beside the toilet: a horizontal bar on the side with the most open floor space, at a height the user can reach while seated
- Behind the toilet: a vertical bar if the user backs up to sit, or if they need to push up from a low seat
- Shower seat: a vertical bar at the seat’s front edge, plus a horizontal bar on the wall the user faces
- Tub floor to standing: an angled bar from low to high gives the hand a place to land at every point in the rise
If you want the full walkthrough on mounting heights and hardware, our grab bars for shower guide goes deeper than this overview. For the official dimensions, see this ADA compliance grab bar reference.
One more thing worth saying plainly: if the person’s needs are changing fast, or there’s been a recent fall, a grab bar alone may not be the right first move.
Step 2: Locate Wall Studs and Mark Your Mounting Holes
Finding studs is the whole ballgame. A bar screwed into drywall alone will hold until the moment someone actually needs it.
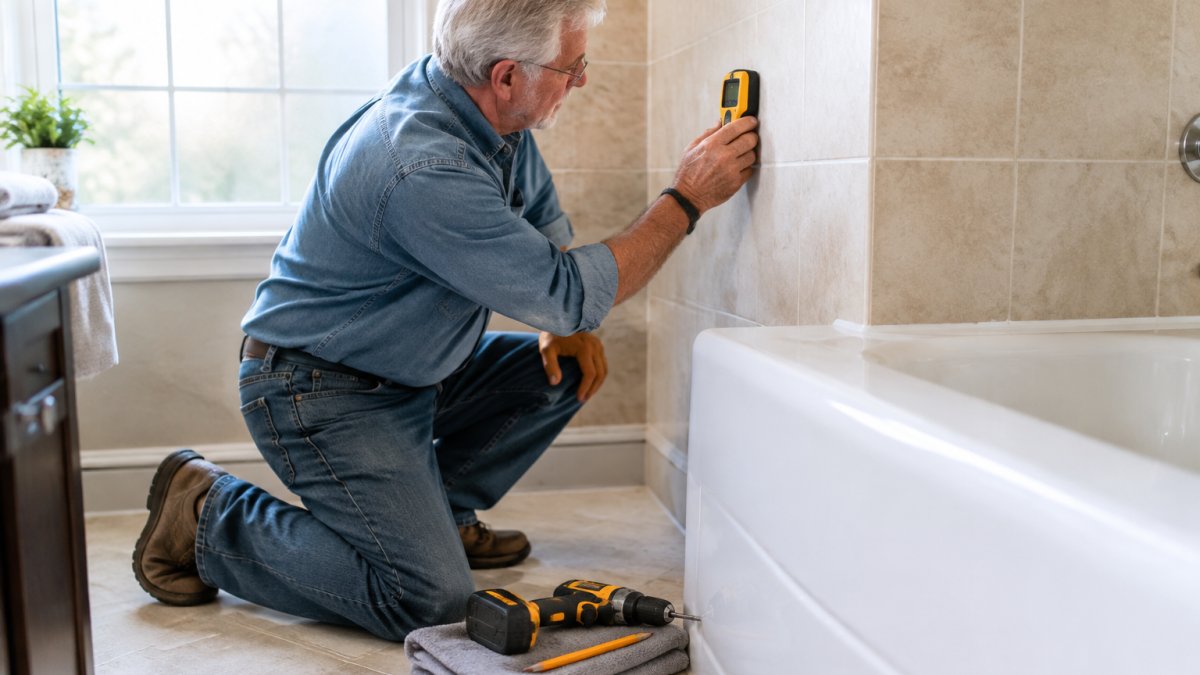
Run your stud finder across the wall and mark both edges of each stud with a pencil. Studs usually sit 16 inches apart, though older homes can run 24.
Now hold the bar against the wall and mark your mounting holes through the flange openings. Use the level here.
Here’s the part many guides get wrong: both flanges should land on solid wood. If only one does, stop and read Step 4 before you drill anything.
Step 3: Drill Pilot Holes and Fasten the Bar to Studs or Blocking
Pilot holes keep the screw from splitting the stud and keep it going where you aimed it. Drill a hole slightly narrower than your screw shank, straight in, not at an angle.
For tile, start with a small masonry bit and go slow. Too much speed cracks the glaze, and a cracked tile around a grab bar is a leak waiting to happen.
Drive the screws until the flange sits flush and tight. Then give the bar a hard pull with both hands. If it shifts even a little, back the screw out and find out why.
Step 4: Grab Bar Installation Without Studs: What Actually Holds
Start with the label. A grab bar sold for safety should state a load rating, and the fasteners should state one too.
Three approaches work, in order of how much I trust them:
Adding blocking. Cut open the wall, install a wood backing board between studs, patch, and mount normally. This is the strongest answer and the messiest one. It’s also the only one that turns a hollow wall into a real anchor point. If the bathroom is already being opened up for other work, do this now and thank yourself later.
Snap-in wall anchors made for grab bars. These are engineered for this exact job and are sold with load ratings on the package.
Toggle bolts rated for the load. These spread inside the hollow wall and hold well when installed correctly.
What most guides miss is that a hollow-wall anchor is only as good as the wall itself.
How to Verify the Installation Actually Holds
A bar that feels tight in your hand at install time can loosen over months. Here’s how to check it like it matters.
Grip the bar and pull down hard with your full weight, then push away from the wall. Do this before anyone else uses the bathroom. A bar that creaks, shifts, or feels soft is not finished.
Watch out: a bar that passes the first pull test can still loosen later if the wall behind it becomes damp, if the caulk around the flange opens up, or if the user’s weight or grip changes.
When to Stop and Call a Professional
Some walls tell you to stop. If the stud finder gives you nothing solid across the whole span, if the drywall is soft or stained, if you’ve hit a patch of tile that’s already loose, or if both flanges can’t land on something real, put the drill down.
If the wall is questionable, or you simply don’t want to gamble, this is the point to schedule a consultation with George for an in-home look before you spend a Saturday on it.
Step 5: Angled vs Straight Grab Bars and Which Fits Your Bathroom
Angled vs straight grab bars comes down to one question: does the user need to pull up from low, or steady themselves while standing?
An angled bar gives a hand a natural place to land during a rise from the tub floor or a low seat.
My honest take: most bathrooms need both, in different spots.
Where the angled bar falls short is in tight spaces. The diagonal eats wall real estate and can crowd a small shower. Measure twice.
Step 6: Tile, Fiberglass, and Other Wall Surfaces
Fiberglass is the forgiving surface. It flexes, drills cleanly, and hides a slightly off-center hole. Just back the drill pressure off near the end so you don’t punch through the shower wall into the next room.
Tile is fussier. Use a masonry bit, keep the drill slow, and put masking tape over the mark to stop the bit from wandering. Caulk around the flange afterward, because water behind tile is a slow and expensive problem.
Drywall needs anchors or blocking, full stop. Plaster over lath can be surprisingly strong, but test it before you trust it.
Step 7: Test the Load, Then Check It Every Season
Grip the bar and pull down hard with your full weight, then push away from the wall. Do this before anyone else uses the bathroom. A bar that creaks, shifts, or feels soft is not finished.
Then put a reminder on the calendar. Every season, check each screw for looseness and each flange for caulk gaps. Grab bars don’t fail dramatically.
If you’re thinking beyond the tub, our bathroom fall prevention checklist covers the rest of the room: lighting, flooring, and the path from bed to bath. And if you’d like to learn the techniques that make bathing safer before you ever pick up a drill, the Free Safe Bathing Course walks through them at your own pace.
| Step | What You Do | Time | Watch For |
|---|---|---|---|
| 1 | Place bars at elbow height | 20 min | Reaching overhead |
| 2 | Find studs, mark holes | 15 min | Only one flange on wood |
| 3 | Drill pilots, fasten | 30 min | Cracked tile, loose flange |
| 4 | Solve missing studs | 30-60 min | Weak or damp drywall |
| 5 | Choose angled or straight | 10 min | Crowded small showers |
| 6 | Match surface method | 20 min | Water behind tile |
| 7 | Load test and seasonal check | 5 min | Slow loosening |
Grab bars are the cheapest safety upgrade in the house, and the one most often installed wrong.
Frequently Asked Questions
Can you install grab bars for seniors without hitting a wall stud?
Sometimes, but the hardware matters more than the bar. Grab bar installation without studs relies on toggle bolts, hollow-wall anchors rated for the load, or a mounting rail that spreads force across several fasteners. These work in drywall or fiberglass, but they are not equal to a stud mount, and they should never be used in tile that is already cracked or loose. If you cannot find a stud and do not want anchors, add blocking behind the wall or bring in a professional to assess it.
Should grab bars be angled or straight?
Straight bars are the standard for most bathrooms because they give a predictable, horizontal pull for standing and sitting. Angled vs straight grab bars comes down to the transfer: an angled bar beside a tub or toilet can help someone who needs to lower themselves gradually, while a vertical bar gives a handhold for pulling up. Many bathrooms benefit from a mix. Test the position with the person who will use it before you drill anything.
What is the average cost of installing grab bars?
Costs vary widely by wall surface, hardware, and whether a professional is involved, so treat any single number with suspicion. A basic bar and fasteners are modest; the labor and any blocking work drive the rest. Ask for a written estimate that separates materials from labor and states what happens if a stud cannot be found. For a full bathroom safety review, Bentley Baths offers a free in-home or virtual evaluation to identify what is actually needed.
Is professional grab bar installation safer than doing it yourself?
Professional grab bar installation is safer when you are unsure about studs, wall surfaces, or the person’s transfer needs. A pro can add blocking, choose fasteners rated for the load, and place the bar where the user actually reaches. That said, a confident DIYer with a stud finder, a level, and the right anchors can do a solid job on drywall or an accessible stud. The real risk is a bar that looks fine and pulls out under a full-body grab.
Time required for each grab bar installation step


